

Free Standard Shipping on All Orders $285+
Instructions for Use (IFU)
Product Allergens
See any common allergens this product may contain >>Price breaks are offered on most items...
This amount is an estimate based on retail price. The actual amount due (shown at the final stages of your order) may be different from what is displayed here.
Return Policy
Items returned within 30 days of purchase with a return authorization number on the outside and inside of the return box will be credited 100%. Product returned between 31 and 60 days from purchase date is subject to a 20% restocking fee. Ultradent will not accept returns after 60 days. Errors in shipment must be reported within 14 days of invoice date. All return authorization numbers become invalid 90 days after date of issue. A return authorization number must accompany all returns to receive proper credit. Please contact Customer Service at 800.552.5512 for assistance.
Limited Warranty
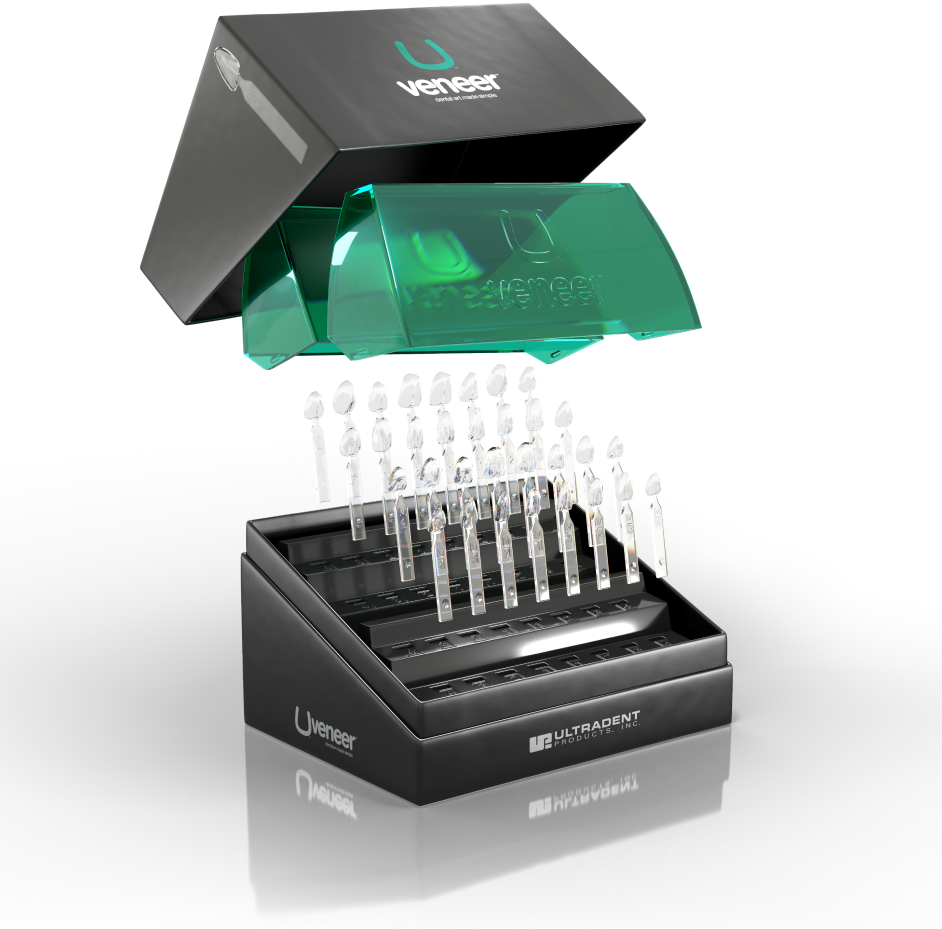
The original Uveneer template kit has everything you need to create a highly esthetic restoration with a perfect finish on both uppers and lowers. The templates help make procedures quick, cost effective, and minimally invasive. Templates from the original kit were designed to create beautiful, symmetrical smiles. The templates create a blank canvas for the dentist to add custom contours and anatomy to fit each patient’s needs.
Both Uveneer and Uveneer Extra template systems can be used for mock-ups, shade matching, provisionals, and composite veneers.
- Creates predictable, reproducible, natural-looking composite restorations
- Prevents the oxygen inhibition layer during curing, resulting in a hard, glossy surface
- Allows light to pass through the template to the composite for effective curing
- Works with any preferred composite
- Releases easily from cured composite resin
- Requires minimal adjusting or polishing, saving time
- Facilitates application on individual or multiple teeth
- Autoclavable and reusable, making it a cost-effective choice
- Uveneer Extra templates offer additional sizes for more patients, including Extra Large, Large, Medium, and Square
The unique, minimally invasive Uveneer direct composite template system creates beautiful composite veneers with predictable shape and symmetry. It mimics natural dentition and is designed to create high-quality, natural-looking anterior restorations in just one visit. Uveneer templates use innovative technologies that help achieve a refined, anatomically correct, high-gloss restoration in a fraction of the time than if done freehand. Results are both reproducible and predictable, making your anterior restorations faster and more cost effective.
Simple to Use for Fast & Cost-Effective Veneers
Uveneer direct composite templates make it easy to create beautiful veneers for every patient, every time. Their unique templated design allows you to create high-quality anterior restorations, require minimal adjusting or polishing, and are faster than sculpting each restoration by hand. They can also be used for cosmetic mock-ups and shade selections, as well as temporary veneers during porcelain veneer creation. They can be used on individual or multiple teeth and are autoclavable* so they can be used again and again. The ease and speed of the Uveneer template system will enhance the efficiency of any practice.
*Base in which templates arrive is not autoclavable, rather only the templates themselves. Do NOT autoclave the base.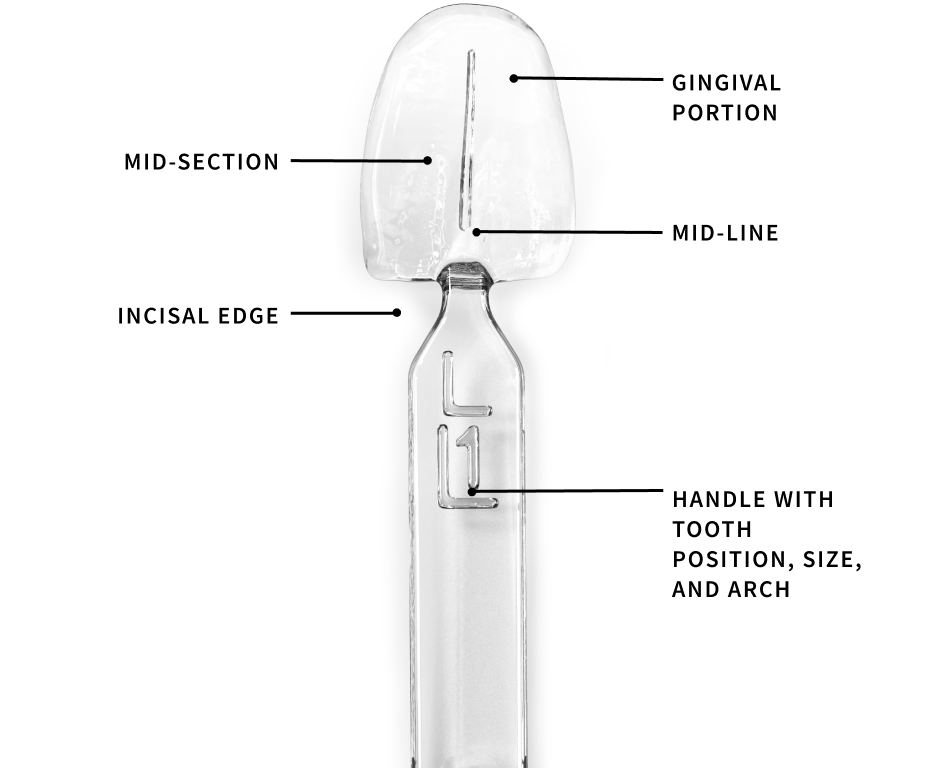
Mimics Ideal Tooth Anatomy for Beautiful Symmetry
Each template is designed to mimic ideal tooth anatomy according to the rules of smile design and the "golden proportion." Each template incorporates ideal height to width ratio, contour, embrasure, and center midline—resulting in beautiful symmetry every time.
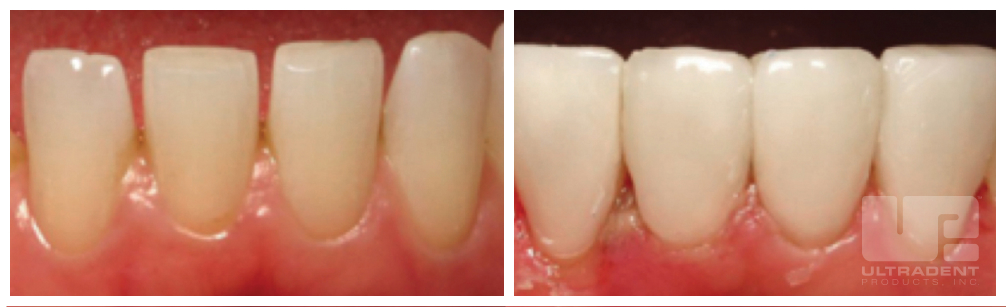
Due to this precise anatomical contour, the final result will yield different thicknesses of composite (less toward the incisal third and gingival areas and greater in the middle of the facial surface). This varied thickness of material creates different effects and values, and as a result, only one shade of composite is needed in many cases to get a natural gradient effect.
 Courtesy of Dr. Rafael Beolchi and Dr. Fernando Rigolin.
 Courtesy of Dr. Hal Stewart.
Features Innovative Medical Grade Technology
Uveneer templates are made from medical grade translucent plastic that allows light to pass through to the composite during curing. This innovative design works with any light-cured composite resin. Uveneer templates also leave a finished glossy and contoured surface by preventing an oxygen inhibition layer from forming during the curing process. Each template has also been treated with a nonstick coating that allows them to easily release from the cured composite during the procedure.

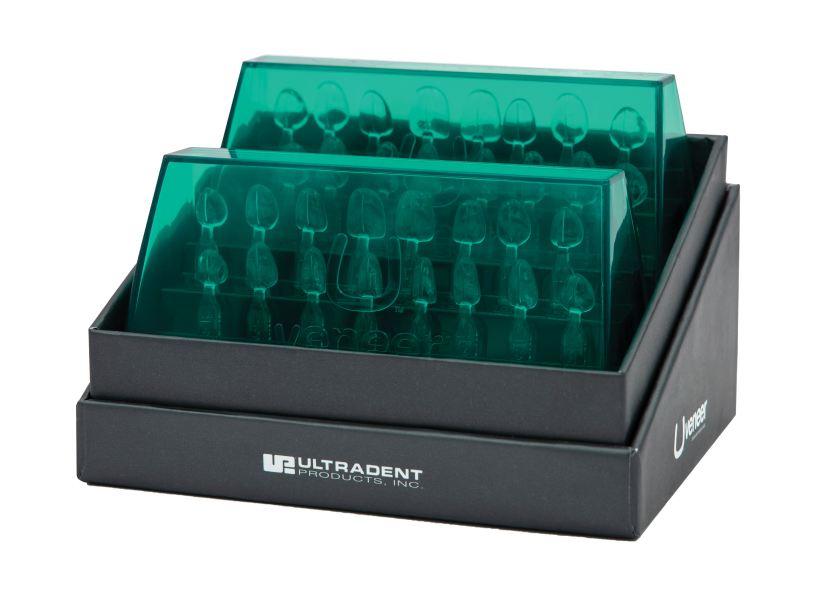
Includes Templates for All Anterior Teeth
The full Uveneer template system kit features 32 templates in total, including both large and medium sizes. Each arch consists of eight templates from centrals to premolars (bicuspids). Each Uveneer template is numbered to correspond with tooth number, tooth size, and upper or lower arch to assist in correct replacement.
Individual replacement templates are also available; please call our customer service department at 888.230.1420 to order.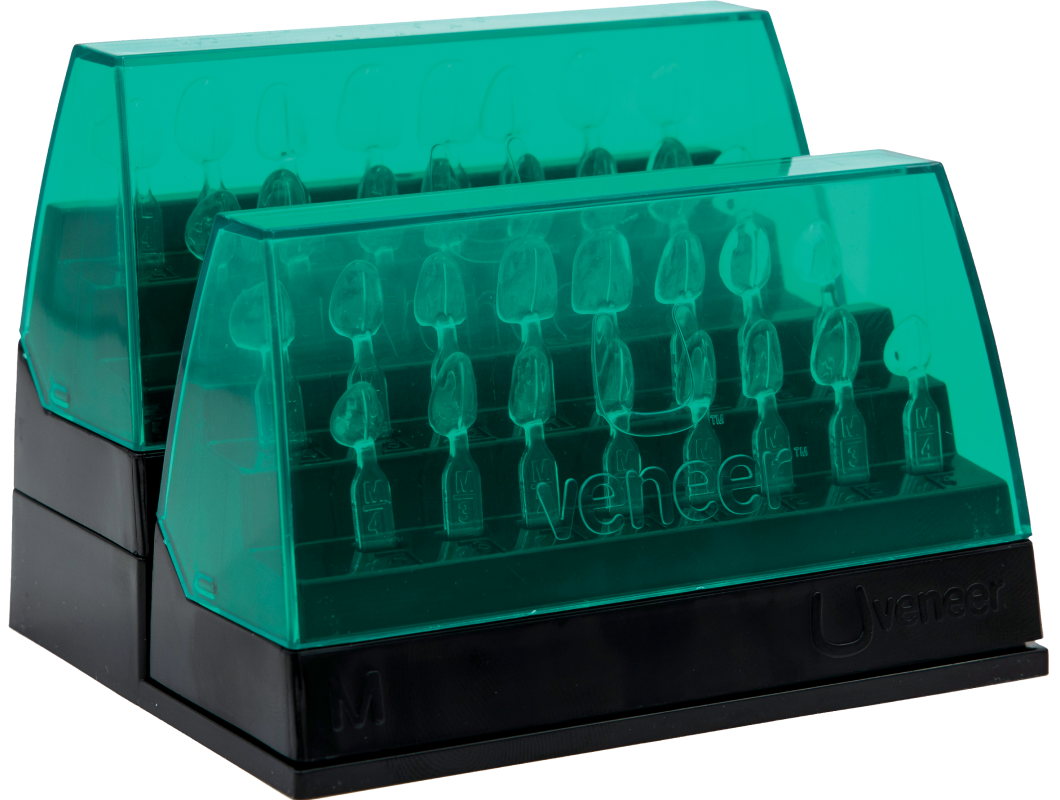
Exclusive to Ultradent—the Only Direct Composite Veneer Template System
The Uveneer template system is the only template system designed to create beautiful direct composite veneers in one visit and is exclusive to Ultradent. With Uveneer and Uveneer Extra templates, clinicians can create veneers with predictable shape and symmetry every time, for every patient.


Clinicals
Missing Lateral Incisor and Peg Lateral

Before.

After.
A young girl with congenitally missing lateral incisor and a peg lateral. Using Ribbond single-visit bridge and Uveneer templates provide aesthetics, durability, and immediate convenience.
Images courtesy of Dr. Bob Lowe
Upper Arch Restoration for Eight Teeth

Before.

After.
Smile enhancement using composite veneers with Uveneer templates for 8 teeth in the aesthetic zone.
Images courtesy of Dr. Ian Shuman
Upper Arch Restoration

Before.

After.
An amazing smile transformation for this young man using composite layering technique and Uveneer template.
Images courtesy of Dr. Victor Acosta
Non-Vital Central Incisor

Before.

After.
Composite veneer on a dark non-vital central incisor using opaquer, tints and the Uveneer template.
Images courtesy of Dr. Ahmed Husam Abu Diab
Esthetic Alternative to Partial Dentures

Before.

After.
This patient who was embarrassed of his teeth and disliked using a removable partial denture, or flipper, had this to say about the restorative work done using Uveneer: "I'm very pleased with the results and can't tell you how much I do not miss wearing a flipper. I'm smiling much wider these days and thankful that a procedure like this can give me (or anyone in this position) some time to figure out the ideal and permanent solution [for] a smile."
Images courtesy of Dr. Sigal Jacobson


Procedures
Uveneer Direct Composite Template System Step by Step
See Instructions for Use for complete instructions, warnings, and precautions.
Step 1

Choose Mosaic™ universal composite or preferred composite shade(s). Select the template that corresponds with the tooth being restored. See handle of template for corresponding tooth number, size, and arch.
Step 2

Remove all caries if needed and minimally prepare the tooth.
Step 3

Place interproximal separating matrices and apply Ultra-Etch™ etchant, Peak™ SE Primer, or preferred etch.
Step 4

Rinse etch according to manufacturer’s instructions. Do not rinse if using Peak SE Primer.
Step 5

Apply Peak™ Universal Bond adhesive or preferred adhesive to tooth surface.
Step 6

Light cure with VALO™ curing light 1 x 10 seconds on Standard Power. If using other curing light, cure according to manufacturer instructions.
Step 7

Apply Mosaic universal composite or preferred composite directly onto tooth.
Step 8

Do not light cure composite.
Step 9

Select chosen Uveneer template. Template should ideally cover the entire facial surface of the tooth. If not, additional composite may be used at the periphery to compensate.
Step 10

Align centerline of template parallel to the midline of the face and perpendicular to the incisal plane. Using thumb, press the concave side of the selected template onto the tooth. Press firmly to remove any trapped air.
Step 11

Remove any excess composite from the periphery.
Step 12

Using VALO curing light, cure composite through template. For every 2mm layer, cure 1–2 x 10 seconds on Standard Power, 1–2 x 4 seconds on High Power, or 1–2 x 3 seconds on Xtra Power. If using other curing light, cure according to manufacturer instructions.
Step 13

Remove the Uveneer template by gently lifting the handle. Using VALO curing light do final cure directly onto composite. To ensure composite is cured thoroughly, for every 2mm layer, cure 3 x 10 seconds on Standard Power, 3 x 4 seconds on High Power, or 3 x 3 seconds on Xtra Power. If using other curing light, cure according to manufacturer instructions.
Step 14

Avoiding the glossy facial surface, trim excess composite from periphery with a fine flameshaped bur in Jiffy™ Composite Finishing Bur Kit. Use Jiffy™ Composite Polishers, Brushes, Diamond Strips, or Proximal Saws for minimal finishing and adjusting if desired.
Step 15

Immediately after use, thoroughly wipe template with alcohol pad, dry, bag, and autoclave according to Uveneer template IFU. Do not leave any composite residue on the template in order to maintain translucency and shine.
Step 16

Testimonials
"Terrific tool to quickly and easily create beautiful anterior restorations."
Dr. Gary M. Radz, DDS
"In a single day, I was able to do 11 mock up veneers that were not part of the original schedule, resulting in several new cases being accepted. I wouldn’t want to work without Uveneer now."
Dr. Chad Wagener, DDS
“The simplicity of Uveneer is absolutely remarkable. Why didn’t I think of this?”
Dr. John C. Comisi, DDS, MAGD
"Uveneer makes the practice of the anterior esthetic dentistry easier, faster and better."
Dr. George Freedman, DDS
Frequently Asked Questions
-
How do Uveneer templates work?
The translucent templates are pressed over composite that has been laid on the tooth after etching and bonding. The templates are removed after the material has cured, thus creating a perfect, contoured, shiny surface. Uveneer templates are easy to handle, have a nonstick surface, and are autoclavable and reusable.
-
What curing light works best with Uveneer templates?
Any curing light can be used with Uveneer templates. VALO™ curing light is the optimal choice because of its quality and durability.
-
What type of composite should I use?
We recommend using Mosaic™ universal composite, but Uveneer templates are compatible with any desired composite and any layering technique.
-
Can Uveneer templates increase practice profitability?
Yes! Dentists who use Uveneer templates report that they are performing many more composite veneer procedures than before because they find the process so quick and easy—and affordable for their patients, which has led to higher case acceptance.
-
Are Uveneer templates reusable? Autoclavable?
Yes, the templates should be autoclaved after each use and can then be reused.
-
What are the main advantages of using Uveneer templates?
You can use any preferred composite material, and the results are consistent and predictable with regard to final tooth shape, shine, and smile design that otherwise would be difficult or impossible to accomplish. It is very easy to use, saves valuable time because there is no need to spend time carving or polishing, and you only need minimal tooth preparation. It is also cost-effective for both patients and dentists.
-
When should I use Uveneer direct composite template system?
Uveneer templates can be used for any application where the facial side of the tooth needs to be rebuilt.
Applications include:
- Direct composite veneers
- Mock-ups
- Temporaries while porcelain veneers are being made in the lab
- Broken teeth and Class V, IV restorations
- As a stent for gum contouring
-
What prompted this innovation?
While composite materials continued to develop and improve, the method of direct composite veneer application remained unchanged. Dr. Sigal Jacobson was frustrated that she couldn’t achieve predictable results each time and that the process was so time consuming. She decided to do something about it.
-
Will the shine from Uveneer templates last?
The shine from Uveneer templates last and look like a natural tooth, because the templates are used as an oxygen barrier to prevent the air-inhibited layer.
-
Are Uveneer templates cost effective?
Uveneer templates are cost effective because the templates are reusable—by preparing just a couple composite veneers, the kit will have paid for itself.
-
How long do the Uveneer templates last?
Uveneer templates are designed to last if proper care and instructions are followed according to the Uveneer template IFU. Replacement templates are available should one become lost or broken.
-
Is there a learning curve when first using Uveneer templates?
Uveneer templates are easy to use. But, like all new tools, it can take a little practice to become proficient. One of the good things about the Uveneer template system is that if you aren’t 100% satisfied with your initial result, you can simply cut back a small layer of composite with a bur, then press the Uveneer template with more composite onto the tooth again. You will quickly learn, after one or two trials, how much pressure to use and how much composite to apply to the template. For beginners, we suggest doing a mock-up on the patient—creating a composite veneer without etching or bonding–to evaluate color and shape without committing to the result. We also recommend when first starting out to only work on single-tooth rather than multiple-tooth cases. After gaining some experience and confidence you can then skillfully manage bigger cases.
-
How does this system compare with prefabricated composite veneers?
Unlike prefabricated veneer systems, you can use your own composite and can use layering or cut-back techniques if needed. The Uveneer template process removes several shortcomings of prefabricated systems like thickness, sizing and shade restrictions, cost, and stock holding.
-
How do I utilize Uveneer templates when performing a Class IV restoration?
Before beginning any restoration, we recommend cleaning off any decay, slightly preparing the facial side of the tooth so that the template has a passive fit, placing the separating matrix, etching, bonding, and then covering the facial side of the tooth with composite. This way you will prevent the patchy look that can come from minor staining in the future.
For a Class IV restoration, or to extend the length of the tooth, simply apply the composite directly to the tooth, filling in the missing areas free-hand, and then press the Uveneer template onto the composite from the facial side and apply pressure from the palatal side with your finger. We recommend using Mosaic™ universal composite in these cases to create the perfect glossy finish and minimize color changes.
-
How can you use Uveneer templates to restore a peg lateral on the lingual side?
- Place separating matrix.
- Etch, bond, and cure.
- Apply the matching shade composite on the tooth in the same manner as if you were to finish the case free-hand. Ensure you close the gaps and apply composite on the facial side as well.
- Press the Uveneer template that matches the size and tooth number onto the composite on the tooth and apply pressure from the palatal side on the composite and press it flat with the palatal side of the tooth.
- Remove excess composite with a probe. Spot curing for 1–2 seconds will help with the cleaning process.
- Finish curing.
- Remove any excess material from the periphery with a fine bur and polishing discs. Do not touch the facial glossy surface during the finishing process.
-
How do you avoid ledging in the emergent zone?
Correctly finishing a composite veneer is an important step for the health of the surrounding tissue and can help prevent ledging.
Before pressing the Uveneer template over the composite, make sure to not overload the tooth with composite resin. If you apply more than needed you will end up with too much excess to clean. Apply enough resin (or less, as a second layer can be added later) to finish the case without the Uveneer template. Next to the gingival areas apply minimal to no composite as pressing the Uveneer template will spread the composite to those areas. Just before curing, use a fine probe and remove the majority of the excess while applying finger pressure directly on the template. A quick spot cure can also help with removing resin excess. After the final curing, use an extra fine diamond flame shape bur for the final flash removal. For finishing the interproximal areas, use a seesaw and polishing diamond strips.
-
Can Uveneer templates be used with children?
Yes! Pediatric dentists often have to deal with fractured teeth and children don’t have the patience to sit in the dental chair for long procedures. The Uveneer template system is very popular with pediatric dentists as they help to create faster, esthetic restorations.
-
I completed two restorations—one with a Uveneer template and one free-hand. Both were prepped the same. How come the Uveneer template tooth was whiter than the free-hand tooth?
Difference in color between adjacent teeth can be a result of a few different things. Sometimes, a difference in thickness of composite between the two teeth can change the final color of the restoration. The thicker the layer of composite, the higher the shade value of the final result. It could be that more composite was used with the free-hand restoration than with the Uveneer template. Because of the concave shape of the template, the composite material will spread more which will create more natural value. In order to ensure the same final shade and value, use same thickness of composite and the same technique on both teeth.
There may have also been a difference in the original color between the two teeth. To avoid differences in the final shade, always complete a direct mock-up on the tooth with a Uveneer template so you can better determine the final outcome before etching and bonding.
-
If a patient has a wider or longer tooth than the template, can I still use the Uveneer template system?
When we created the Uveneer templates, we looked at various studies about smile design, rules, and proportions, so most patients will fit into the templates in your kit. However, some patients grind their teeth or will have gum recession. In these cases, you can adjust the veneer to the desired length with a bur or disc. If the patient has gum recession, you can also add some composite next to the gums as if you were doing a Class V restoration.
If the patient has large or wider teeth, you can complete the restoration by pressing the template and blending the excess composite to periphery. Some small finishing adjustments may be required.
-
When should I use a flowable composite?
A flowable composite should only be used as a last layer when a high-viscosity composite is not shiny enough. We recommend using Mosaic™ universal composite because it showcases the needed shine without needing to add any flowable composite. However, if you want to add a flowable as a final glaze, we recommend only heavy-filled flowables as they will not stain as much as regular flowables.
-
What should I do if the veneer changes color after the restoration was completed?
If a patient does return with stained veneers, use a bur to remove the top layer of stained composite. Etch, rinse, bond, cure, and add a new layer of composite with the correct Uveneer template and cure.
Smoking, red wine, coffee, tea, and certain foods can stain composites. In addition, flowable composites have a low amount of filler and can stain or change color, particularly if a layer of flowable composite is used as the top surface layer. If a flowable is used with the Uveneer template system as the top surface layer, it should be a flowable with a heavy fill and more filler particles.
Also keep in mind that composite can be under-cured, but not over-cured. We recommend using a strong curing light like the VALO™ curing light to ensure a complete cure.
Brochures

Uveneer Direct Composite Template System Sales Sheet
1003709-PKAR01

Clinical Guide: Gemini™ Laser and Uveneer Extra Direct Composite Template System
Dr. Sigal Jacobson, Melbourne, Australia

Clinical Guide: Uveneer Extra Direct Composite Veneers
Dr. Rafael Beolchi, São Paulo, Brazil

Uveneer Direct Composite Template System Family Brochure
1003710AR06

Uveneer Direct Composite Template System Technique Guide
1003858AR09

