Ultradent™ Ultra-Trim Scalloping Scissors
Free Standard Shipping on All Orders $285+
Product Allergens
See any common allergens this product may contain >>Price breaks are offered on most items...
This amount is an estimate based on retail price. The actual amount due (shown at the final stages of your order) may be different from what is displayed here.
Return Policy
Items returned within 30 days of purchase with a return authorization number on the outside and inside of the return box will be credited 100%. Product returned between 31 and 60 days from purchase date is subject to a 20% restocking fee. Ultradent will not accept returns after 60 days. Errors in shipment must be reported within 14 days of invoice date. All return authorization numbers become invalid 90 days after date of issue. A return authorization number must accompany all returns to receive proper credit. Please contact Customer Service at 800.552.5512 for assistance.
Limited Warranty
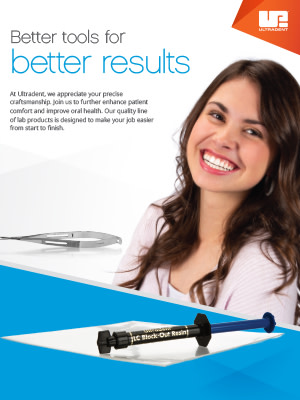
Ultra-Trim Scalloping Scissors are ideal for fine trimming of whitening trays to carefully adjust the tray material to the patient’s natural anatomy.
- Use for precision trimming of the border around interdental papillae
- Spring loaded to minimize finger fatigue
- Grips tray material easily
- Made of durable stainless steel
Technical Details
Spring Loaded to Reduce Finger Fatigue
Ultra-Trim Scalloping Scissors feature a spring-loaded design that allows the scissors to open automatically, which helps to reduce finger fatigue.
Precisely Crafted
Precision trimming of a whitening tray requires a precision-made instrument. The small, exact end of the Ultra-Trim Scalloping Scissors makes creating a border around interdental papillae easy.
Easily Grips Tray Material
The precise tip ends of the Ultra-Trim Scalloping Scissors grip the tray material, which makes trimming even easier.
Clinicals
Trimming the Tray
The Ultra-Trim Scalloping Scissors are used for precise trimming of custom whitening trays.

Procedures
Tray Fabrication Step by Step
See Instructions for Use for complete instructions, warnings, and precautions.
Step 1

Pour impression with fast-set plaster or dental stone. Pour alginate shortly after making impression to ensure accuracy. Trimming is less work if quantity of stone is kept to a minimum. Palate and tongue areas are not poured or should be removed after plaster has set. Allow model to dry two hours.
Step 2

For reservoir spaces, apply Ultradent™ LC Block-Out resin approximately 0.5 mm thick onto labial surfaces and approximately 1.5 mm shy of the gingival margin. DO NOT extend onto incisal edges or occlusal surfaces. Using a VALO™ curing light, cure each tooth 5 seconds. Wipe off oxygen inhibition layer.
Step 3

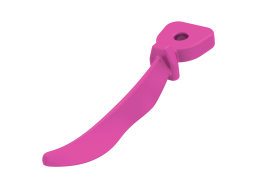
With a vacuum former, heat tray material (Sof-Tray™ Classic Sheets) until it sags approximately ¼" to ½" for the 0.035" material and 1" for the thicker material (0.060" and 0.080"). Adapt plastic over model. Cool and remove model from the vacuum former. Cut excess bulk of material away with serrated plastic trimmers (e.g. Ultradent™ Utility Cutters).
Step 4

With small tactile scissors (e.g. Ultradent™ Ultra-Trim Scalloping Scissors), carefully and precisely trim the tray to the clear line which is at the gingival height. Scallop edges to avoid contact with gingival tissue.
Step 5

Return tray to model; check tray extensions. Gently flame polish the edges one quadrant at a time, if necessary, with a butane torch. While still warm, immediately hold periphery of each segment firmly against model for three seconds with water-moistened gloved finger. If this over-thins the tray material, fabricate a new tray.
Step 6

Review enclosed instructions with patient to brush teeth and explain the process of loading the tray by expressing one continuous bead of gel approximately halfway up from the incisal edge on the facial side of the tray from molar to molar. Explain that this should use about 1/2 to 1/3 of a syringe.
Step 7

Place tray over teeth. Gently press tray to move gel into place. Pressing too firmly will force gel out of tray.
Step 8

Remove excess gel with a soft toothbrush.
Step 9

Clean tray with soft toothbrush and water. Remind patient to follow the whitening regimen you have established.
Note: See Instructions for Use for complete instructions, warnings, and precautions.
Frequently Asked Questions
-
When trimming the tray, how close should I come to the gingival margin?
Try to leave about a 0.25 to 0.33mm from the gingival margin.
-
Do Ultra-Trim Scalloping Scissors need to be sharpened?
If properly cared for, Ultra-Trim Scalloping Scissors will provide years of satisfactory use. Like any pair of scissors, over time the blades will begin to dull. When that happens, we recommend retiring the old pair and using a new pair, rather than trying to have the blades sharpened.
-
Do I really need special scissors for trimming a whitening tray?
Other scissors may be able to do precise trimming as well, but the Ultra-Trim Scalloping Scissors are specially designed to easily cut through the durable vinyl material with precise detail, in the safest and quickest way possible.


